How do I scan with Document Capture Pro or Document Capture?
-
See below.
Scanning with Simple Scan in Document Capture Pro - Windows
You can use the Simple Scan tab in Document Capture Pro to quickly select options and scan.Note: The settings may vary, depending on the software version you are using. See the help information in Document Capture Pro for details.
- Load your original in the product.
- Do one of the following to start Document Capture Pro:
- Windows 10: Click
 and select Epson Software > Document Capture Pro.
 - Windows 8.x: Navigate to the Apps screen and select Document Capture Pro.
- Windows (other versions): Click
 or Start, and select All Programs or Programs. Select Epson Software > Document Capture Pro.
- Windows 10: Click
- Click Select Scanner and select your scanner from the scanner list, if necessary.
- Select the Simple Scan tab. You see a window like this:

- If you want to use a scan job, click the Job Scan tab.
Note: The default job is Scan to PDF. To create more jobs, click the Job Settings button.
- If you want to select specific scan settings for the scan, click the Scan Settings button, select any displayed settings you want to use, and click OK. For additional settings, click the Detailed Settings button on the Scan Settings screen.
Note: See the help information in Document Capture Pro for details.
- Do one of the following:
- To scan the front side of an original, select SCAN single sided.
- To scan both sides of an original,select SCAN double sided.
- View and edit the scanned pages as necessary and click Complete when you are finished.
Note: See the help information in Document Capture Pro for details.
- Select a destination and any settings as necessary and click Complete.
Note: See the help information in Document Capture Pro for details.
Scanning with Document Capture Pro
You can create scan jobs in Document Capture Pro and use them to quickly scan originals and save them to various destinations.Note: The settings may vary, depending on the software version you are using. See the help information in Document Capture Pro for details.
- Load your original in the product.
- Do one of the following to start Document Capture Pro:
- Windows 10: Click and select Epson Software > Document Capture Pro.
- Windows 8.x: Navigate to the Apps screen and select Document Capture Pro.
- Windows (other versions): Click or Start, and select All Programs or Programs. Select Epson Software > Document Capture Pro.
- Windows 10: Click
- Select the Job Scan tab. You see a window like this:
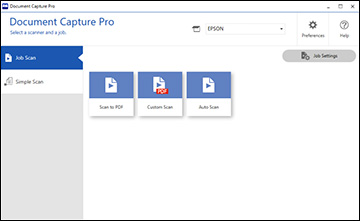
- Select one of the scan jobs (or click Job Settings to create a new scan job). The scanner scans the loaded originals and saves them according to the job settings.
- Depending on the job settings, you may be able to view and edit the pages before saving them. If so, click Complete when finished. The scanned images are saved according to the job settings.
Scanning with Document Capture - Mac
When you scan with Document Capture, the program automatically saves your scanned file on your computer in the folder you specify. You can select settings, preview, and change the scanned file settings as necessary.Note: The settings may vary, depending on the software version you are using. See the Help information in Document Capture for details.
- Load your original in the product.
- Open the Applications folder, open the Epson Software folder, and select Document Capture. You see a window like this:
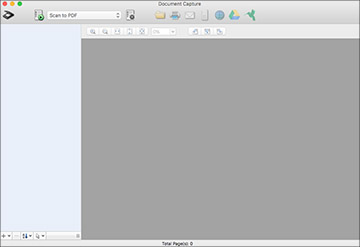
Note: You may need to select your scanner from the scanner list.
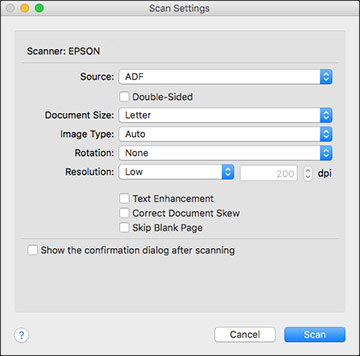
- Click the
 Scan icon. You see a window like this:
Note: If you want to use a scan job that you created instead, select it from the Job list in the Document Capture window, click the
 Start Job button, and skip the rest of these steps.
 - Select any displayed scan settings you want to use.
Note: See the Help information in Document Capture for details.
- If you want to select detailed scan settings, close the Scan Settings window, open the Scan menu at the top of the Mac desktop, and select Displays the EPSON Scan Setup Screen.
- Click the Scan icon and select any detailed scan settings you want to use from the Epson Scan 2 window.
- Click Scan. You see a preview of your scan in the Document Capture window.
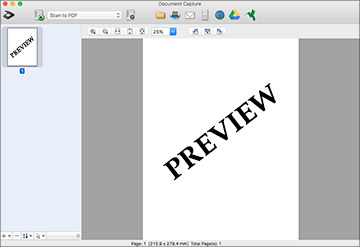
Note: You may have to close the Epson Scan 2 window to view your scan in the Document Capture window.
- If you would like to scan additional originals and add them to the current captured images, click the + icon, select Acquire from Scanner, and repeat the previous steps.
- Check the scanned images and edit them as necessary.
- Click one of the Destination icons to choose where to send your scanned files. (If you cannot see all of the icons below, click the arrow next to the icons.)

- Depending on the destination you chose, click OK or Send to complete the operation.