I replaced an ink cartridge and my product shows that the same ink cartridge is expended. What should I do?
-
If you have just installed a new cartridge and you still see an ink related error, the cartridge may not be installed correctly.
Follow the steps below to make sure the cartridge is correctly installed.
Note:
We recommend that you use genuine EPSON cartridges and do not refill them. The use of other products may affect your print quality and could result in printer damage.- Turn on your product.
- If you see a message on the printer's display screen to install or replace an ink cartridge, press the OK button, then choose Replace now and press OK.
- Lift up the scanner unit.

- Open the cartridge cover.
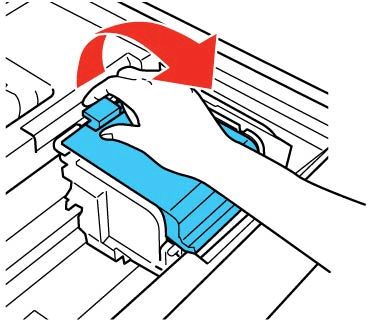
- Press down each ink cartridge until it clicks into place. (If a cartridge is properly seated already, you may not hear a click.)

Note:
When you installed the new cartridge, you should have removed the yellow tape from the bottom. If you know you removed it, skip to step 6. If you're not sure, you can pull out the cartridge to check. (Squeeze the tab on the cartridge and lift it straight up.) Remove the tape if necessary, then reinstall the cartridge, pressing it down firmly.

Caution:
Do not remove any other labels or seals, or ink will leak.
Warning:
If ink gets on your skin, wash it thoroughly with soap and water. If ink gets into your eyes, flush them immediately with water. If ink gets into your mouth, spit it out and see a doctor right away. Keep ink cartridges out of the reach of children. - Close the cartridge cover and push it down until it clicks into place.

- Lower the scanner unit.
 Caution: Never turn off the product while the On light is flashing or you will waste ink.
Published: Feb 27, 2012
Was this helpful? Thank you for the feedback!