I replaced an ink cartridge, but my product shows that the same ink is expended. What should I do?
-
The ink cartridges may not have been installed using the correct procedure, or they may not be seated correctly. Follow the instructions below to correctly install and reseat the ink cartridges.
- Turn on your product.
- Do one of the following:
- If the ink expended message is on the screen, select the option to replace the ink cartridge and press the OK button.
- If the ink expended message is not on the screen, press the
 home button, if necessary, and select Setup > Maintenance > Ink Cartridge Replacement. Press the OK button and then the
  start button.
- When the message to replace the ink cartridges appears on the screen, lift up the scanner unit.

Caution:
Do not move the print head by hand; otherwise, you may damage your product. Do not touch the flat white cable inside the printer. - Remove all the ink cartridges by squeezing the tab on each cartridge and lifting it straight up.
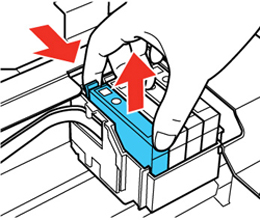
Note: Make sure the yellow tape is removed from each cartridge. Remove only the yellow tape.
- After all the ink cartridges have been removed, reinsert them one by one and press each one down until it clicks into place.

- Close the scanner unit.

- Press the start button. The printer starts charging the ink.
Published: Jan 30, 2018
Was this helpful? Thank you for the feedback!