Follow the steps below to activate Epson Scan To Cloud and Epson Remote Print.
Important: Your product needs to be set up with Epson Connect before you can use these services. If you need to set up Epson Connect, see Epson Connect Printer Setup.
- Sign in to your Epson Connect account. If necessary, select your product in the My Printer/Email List.

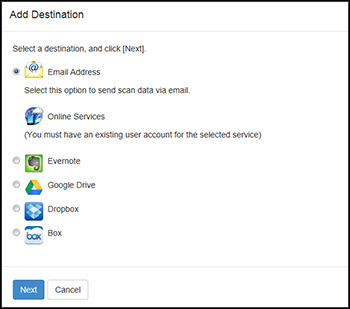
- Expand Scan to Cloud, then select Destination List. Click Add.

- Select your destination, then click Next. Follow the on-screen instructions to set up the destination.

- Expand Remote Print, then select Print Settings. Check Enable Remote Print, then click Apply.
Note: You can choose to assign an Access Key to allow only specific users to print with Remote Print.
