How do I set up Epson Connect for my product in Windows?
-
Do the following:
Note: Make sure your product supports Epson Connect. Visit our Mobile Printing and Scanning Solutions page and select Epson Email Print, Epson Remote Print, or Epson Scan to Cloud. Then scroll down to the Works With section to see a list of products that support the mobile solution.
Important: Your product must be set up with a network connection in order to use Epson Connect services. If you need to set up this connection, see the Start Here sheet for your product for instructions. To see the Start Here sheet, go to the Epson Support main page, select your product, select Manuals and Warranty, and then click Start Here - Installation Guide.
- Download the Epson Connect Printer Setup Utility and run it.
- Agree to the End-User License Agreement and click Next.
- Click Install, then Finish.
Note: If you see a Firewall Warning screen, make sure the Allow Access (Windows Firewall only) checkbox is selected and click Next.
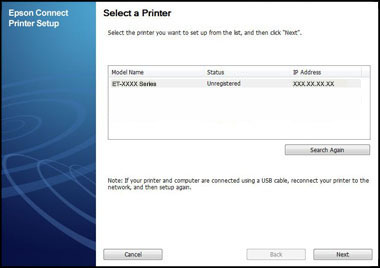
- Select your product and click Next.
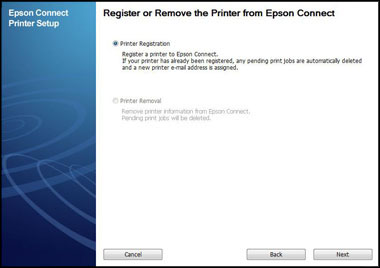
- Select Printer Registration and click Next.
- Select Agree and click Next.
- When you see the Register a printer to Epson Connect message, click OK.
- Agree to the Terms of Use and Privacy Statement, and click Next.
- Do one of the following:
- If you're creating a new Epson Connect account, fill out the Create An Epson Connect Account form and click Finish.
- If you're registering a new product with an existing Epson Connect account, select I already have an account, fill out the Add a new printer form, and then click Add.
- Click Close.
Your product is now registered with Epson Connect. You can now use Email Print, but you must activate Scan to Cloud and Remote Print to use these services. See our Activate Scan to Cloud and Remote Print page for instructions.